Larq Compute Engine Android Quickstart
This guide describes how to build your own Android app using Larq Compute Engine (LCE) and TensorFlow Lite Java Inference APIs to perform inference with a model built and trained with Larq. This can be achieved either by using our pre-built LCE Lite AAR (under 'assets'), or you can build the LCE Lite AAR on your local machine (see here for instructions for either approach).
If you'd rather build a command-line binary than a full Android app, this guide describes how to build an LCE-compatible inference binary that can be executed on Android OS (e.g to benchmark your models).
Create Your Own Android app using LCE and TensorFlow Lite
In this section, we demonstrate how to perform inference with a Larq model in an Android app. We provide a custom LCE-compatible TensorFlow Lite Android Archive (AAR) which you can use in your own Android app to perform inference with the TensorFlow Lite Java inference APIs. In this guide, we use the TensorFlow Lite Android image classification app as an example. To get started with TensorFlow Lite on Android, we recommend to carefully read the TensorFlow Lite Android quickstart before proceeding with the next steps in this guide.
All the required code changes below can also be found in this patch file. Note that step 1 below still needs to be done and that step 3 also requires an nvm install.
1. Get the TensorFlow Lite demo app
To download and build the TensorFlow Lite Android image classification app in Android Studio, follow the instructions here. For an explanation of the source code, see here.
2. Use the 'support' API
The demo TensorFlow Lite Android image classification app supports two APIs: 'support' and 'task'. For use with Larq, we need to select the non-default support API. The two APIs are defined under flavorDimensions in app/build.gradle.
In Android Studio, the easiest is to go to Build -> Select Build Variant and select for the four options: supportDebug, debug, debug, and debug. Then make sure you do a Gradle-sync before building.
3. Add LCE-compatible TensorFlow Lite AAR to the project
To add the LCE Lite AAR to your android project, you can either use the pre-built LCE Lite AAR (under 'assets') or build the LCE Lite AAR yourself on your local machine. Both approaches are explained in detail in the following sections.
To use LCE Lite AAR in the android app, we recommend downloading the LCE package released on GitHub under 'assets' to your local machine. Then follow the instructions below as if you've built the AAR locally.
This AAR includes binaries for arm64-v8a, x86_64, x86 Android ABIs. Please note that currently hand-optimized LCE operators are available only for arm64-v8a. To include binaries only for Android ABIs you need to support, modify abiFilters in the Gradle build as described here.
In case that you would like to make local changes to the LCE code or TensorFlow Lite binaries, you might wish to build the LCE Lite AAR locally. We provide a bash script to build the LCE Lite AAR. The bash script is only tested inside the LCE Docker container. See the LCE build guide to setup the Docker container.
Once the Docker container is set-up, run the following command from the LCE root directory inside the container:
./larq_compute_engine/tflite/java/build_lce_aar.sh
lce-lite-<version>.aar and store the file in the root directory of LCE repository. Transfer the LCE Android archive file from the LCE container to the host machine (where the Android Studio is set-up).
Now execute the following command to install your LCE Android Archive lce-lite-vX.Y.Z.aar to a local Maven repository:
mvn install:install-file \
    -Dfile=lce-lite-vX.Y.Z.aar \
    -DgroupId=org.larq \
    -DartifactId=lce-lite -Dversion=0.1.000 -Dpackaging=aar
Modify the build.gradle file in the the root of the Android project to include mavenLocal() repository:
allprojects {
    repositories {
        google()
        mavenCentral()
        mavenLocal()  # <--- new line added
    }
}
Replace the standard TensorFlow Lite dependency with local LCE Lite AAR in lib_support/build.gradle and remove the standard TensorFlow Lite dependency, but keep the tensorflow-lite-gpu and tensorflow-lite-support dependencies. The latter needs to be kept only partially, see the added exclude line below.
dependencies {
    (...)

    implementation 'org.larq:lce-lite:0.1.000'  # <--- new line added
    // implementation 'org.tensorflow:tensorflow-lite:0.0.0-nightly-SNAPSHOT'  # <--- commented out
    implementation 'org.tensorflow:tensorflow-lite-gpu:0.0.0-nightly-SNAPSHOT'

    implementation ('org.tensorflow:tensorflow-lite-support:0.1.0') {
        exclude module: 'tensorflow-lite'  # <--- this 'exclude' is added
    }
}
Note that the version 0.1.000 is chosen arbitrarily and should match the version passed to the -Dversion argument in the Maven command executed previously.
4. Disable XNNPACK
With the above changes XNNPACK does not work, but we do not need this anyway with LCE. We can disable it by changing line 222 in Classifier.java (under the lib_support folder):
      case CPU:
        tfliteOptions.setUseXNNPACK(false);  // <--- was 'true' before
        Log.d(TAG, "CPU execution");
        break;
5. Add Larq Model to the project
In this guide, we use the Larq QuickNet model for efficient and fast image classification. The FlatBuffer format of the QuickNet model quicknet.tflite can be created by using the LCE converter (also see our Model Conversion and Benchmarking Guide) and needs to be placed in the assets folder of the Android project, within models/src/main/. You also need to use the labels_without_background.txt as its corresponding labels file. The labels file is already available in the asset folder of the TensorFlow Lite image classification Android app.
The TensorFlow Lite classifier in the image classifaction app works with the float MobileNet model. To replace the MobileNet with QuickNet, you need to modify getModelPath() and getLabelPath() methods in the ClassifierFloatMobileNet.java file (under the lib_support folder):
@Override
protected String getModelPath() {
    return "quicknet.tflite";
}

@Override
protected String getLabelPath() {
    return "labels_without_background.txt";
}
The QuickNet model requires additional normalization of the input by changing the IMAGE_MEAN and IMAGE_STD variables in ClassifierFloatMobileNet class:
private static final float[] IMAGE_MEAN = {0.485f * 255, 0.456f * 255, 0.406f * 255};
private static final float[] IMAGE_STD = {0.229f * 255, 0.224f * 255, 0.225f * 255};
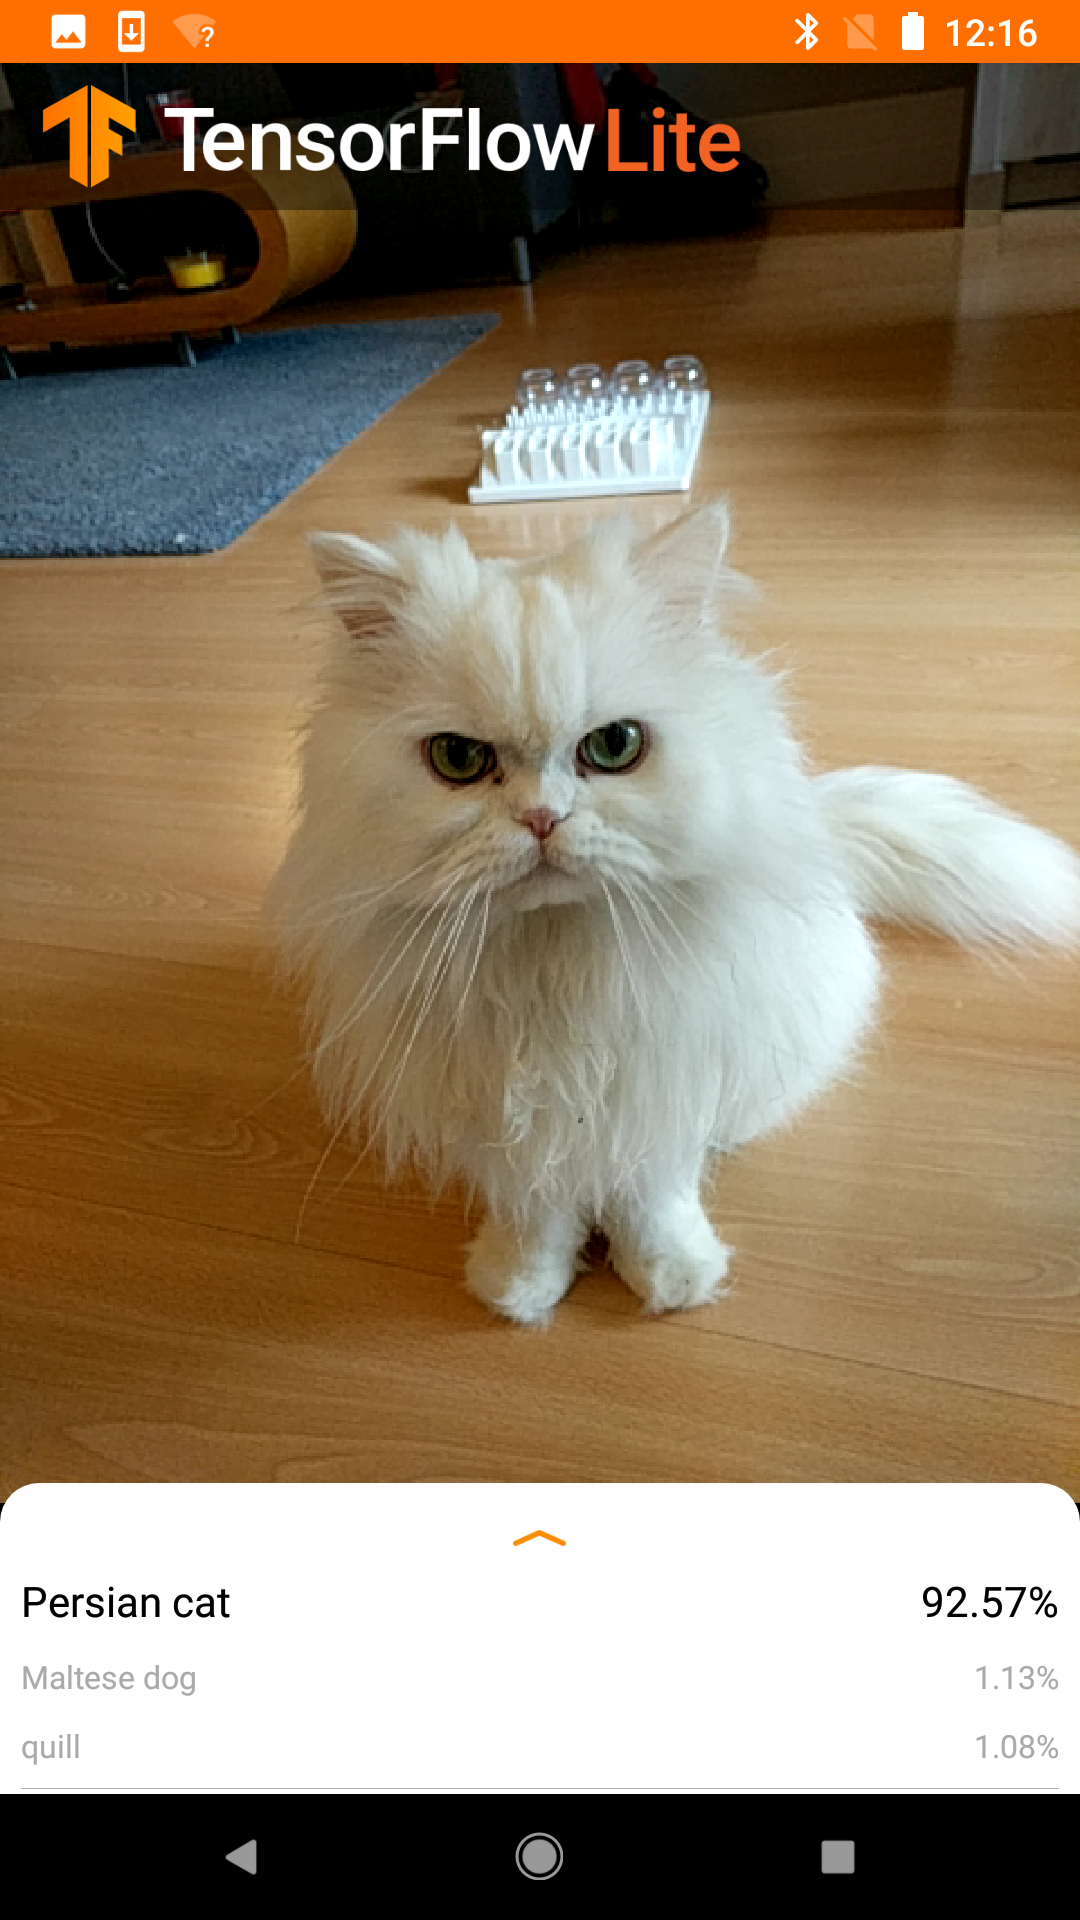
Now you will be able to build the App in Android Studio and run it on your Android phone. Choose the Float_Mobilenet model in the app drop-down list to use QuickNet for inference with the CPU. The following screenshot shows an example of image classification using LCE Lite AAR as the inference engine.